Arts and crafts are a necessary part of life. From the dawn of creativity in our youth to the hobbies that make up our adult lives, everyone benefits from having a creative outlet. But we all know that artistic hobbies can be expensive. It’s important to find savings where you can, and a big part of that is knowing where to shop for what supplies.
This guide will break down the biggest differences between two of our favorite arts and crafts stores, Joanns Fabrics and Michaels, concerning cost and overall quality. Then, we’ll take a look at another option to consider for your arts and crafts needs.
Let’s get started!
Joann Fabrics vs Michaels Prices
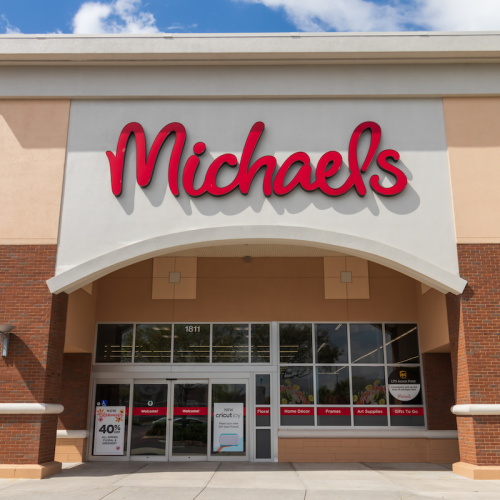
The biggest names in the arts and crafts supply business are Joanns and Michaels. Joanns is the older of the two stores, having been founded in Cleveland in 1943. Michaels, on the other hand, was founded in Texas in 1943.
Both stores now have a commanding presence across the country.
By most accounts, prices at Michaels are higher than those at Joanns. According to a Business Insider deep dive, Michaels prices across various departments are often more expensive than Joanns. The differences range from a few dollars to as much as $10 dollars for certain goods.
But which offers better deals? That depends on the tradeoffs between:
Price vs Value
The tradeoff between Michaels vs Joanns is one of quality vs accessibility.
Why are prices at Michaels higher than those at Joanns? Because of differences in the general quality of the goods on offer in both stores. While Michaels is stocked primarily with top of the line products, Joanns offers a broader selection of cheaper, lower-quality products.
But while Joanns might seem cheaper in the short term, there is an argument to be made that shopping at a Michaels store will save you more money over a longer-term.
A premium product is often priced more expensively than a cheaper one because of:
Superior build quality
Greater brand reputation
Warranties or satisfaction guarantees
Better or more ethically sourced materials
If spending a bit more on art supplies upfront will prevent you from having to re-buy them again after only a few uses, they’re a great value. You’ll save more in the long-run.
Which is Better Michaels or Joanns?
It depends on what you’re looking for. Let’s discuss.
Selection: Planning vs Improvisation
When it comes to selecting items, there is a variety of philosophies to what shoppers want when they enter a store. Some shoppers plan out their lists meticulously, then enter the store on an efficient mission. Others prefer to start shopping with a looser idea of what they need, then let in-store displays and promotions guide their decisions.
Are you someone who goes in with a plan, or do you like to improvise?
According to the same Business Insider analysis cited above, Michaels stores tend to offer a better selection on most goods than Joanns. What that means is that, if you’re looking to improvise and find inspiration while you shop, Michaels might be better for you.
Another big difference comes down to:
Specialties: Arts vs Crafts
Between Michaels and Joanns, each craft store has its own respective specialty where it shines in comparison to the other. Namely, they break down like this:
Michaels is more arts-focused – Michaels famously focuses on art supplies and decorations evocative of the finer arts. You won’t be able to find fabrics there, but it’s a better store for stuff like:
High-end art-related technology, like fancy printers
Paint and related supplies (canvases, etc.)
Home decor and seasonal decorations
Joanns is more craft-focused – Joanns is more focused on crafts related to home goods rather than the fine arts (and imitations thereof). As such, it’s a better place to shop for:
Finding the right stock photo agency for your needs is hard. Registration is free for all agencies but when it comes down to purchasing stock photos and images, an investment needs to be made. Each stock photo agency has its benefits and each solves design, photo and media needs. But which one is best for you? Many buyers invest in a few agencies to deal with their ever changing priorities and maintain an active membership with many. These short reviews of the top stock photo agencies will be helpful in educating stock photo buyers about the differences and benefits of each stock photo agency. If you want an even quicker snapshot of each agency, this Top 5 list may serve your purpose better.
123rf gives you more for a lot less offering stunning, practical stock photos that are refreshing and intriguing. They are newer to the industry than the other stock photo agencies and have quickly gained an audience. Their library has 9.5 million photos. Their standard license restrictions include unlimited use and rights to the image. Buyers have the option of credits or subscriptions to purchase images.
The lowest buy in for a new member is $15 USD. This translates into 15 small images (note the image size is 400 x 200), 7 medium or 5 large images. The price-per-image for subscription buyers ranges from 21¢ to 59¢.
123rf, overall, is a great option for purchasing stock photos. They are hip, have a great vibe and are working up the microstock ladder to be a leader in the industry. Image sizes are smaller than other stock agencies but prices are still very competitive.
Shutterstock
Shutterstock is a global e-commerce company and a leading provider of stock photos, illustrations, and footage. Their library is extensive with over 15.2 million photos and 300,000 contributing photographers. Their focus and competitive edge is to provide low-cost images bought on subscription. Smaller buyers who require few images per year will pay more for this privilege but will only need to invest $49 USD to download from their stock library. With their various subscriptions, you could be paying as low as 28¢ and up to $4.08 per image. The standard license limits the reproduction of the image to 250,000 times.
The biggest benefit of using Shutterstock is its vast collection of images. Their history in the stock photo market has enabled them to build an image and stock photo library where buyers can find what they need. If a subscription package is not what you are looking for, try their other stock photo agency, Bigstock, where images and stock photos can be purchased through credits.
iStockphoto
iStockphoto is one of the original stock photo agencies offering royalty free stock photos, vector illustrations, videos, music, audio and Flash at affordable prices and exceptional quality. The iStockphoto library has a collection of 8.3 million photos that is known to be of higher quality than other stock photo agencies. The Vetta Collection, Agency Collection and Exclusives are unique, handpicked images that reflect creativity and build an impression. Standard licenses allow up to 500,000 impressions, a higher value than other stock agencies.
The smallest initial investment for a first time user is $18 USD. The buyer can download 12 x-small stock photos, 4 small photos, a collection of xs, s, and med photos or one large stock photo with a standard license. Photos are downloaded with 300 dpi resolution.
Adobe Stock
Adobe Stock is a stock photo service offered by Adobe –powered by established stock photo agency Fotolia, which they also own–, and it’s fully integrated into Creative Cloud platform. Adobe Stock’s library with over 70 million images (plus videos, 3D models and more) is available directly within any Creative Cloud design app such as Illustrator, InDesign, etc., and you can search, test edit and license stock photos in seconds, without ever leaving your design worksheet. This seamless workflow experience is the added value in Adobe Stock, but it has also its own stand-alone website and you can use the service outside Creative Cloud and Adobe software too.
The minimum investment is of $29,99, which gives you 3 image downloads per month (you can hire it for one month only, or renew it month to month). Images come in all available sizes at no added cost. Hiring a larger subscription lets you save in single image price, as it goes down to between $3 and $0.27 per photo with monthly or annual plans, ranging from 10 to 750 downloads per month. Premium images, videos, 3D models and other extra graphics come at different price points and mostly on demand.
Dreamstime
Dreamstime is a distinguished leader in stock photography with over 11 years of dedicated business in the industry. Dreamstime is committed to using the latest technologies on state of the art hardware to make them technologically progressive yet simplistic in use. Their focus on community has built their usability and library, positioning them as a leader with over 11 million images. They buying options include both subscriptions and credits with image prices ranging from 77¢ to $1.25 per image for credit purchases and 20¢ to 43¢ per image with subscriptions. The minimum investment for a buyer to start immediately downloading is $10 USD for credits, which will award 10 x-small level 0 photos or 3 x-small level 1 photos or 2 x-small level 2 stock photos. Standard licenses limit copies to 500,000 on any purchased stock photo.
Dreamstime has evolved as a stock photo agency due to their community development model that encourages contributions from their buyer and photographer communities. It is a model that has spread the word and built trust in the company’s ability to grow as the industry changes.
If you want to create custom content designs and page layouts for WordPress, the best option for most website owners is to install a page builder plugin. When it comes to choosing one of these plugins, Divi and Elementor are two very popular options.
However, as well as being two of the most well-known and widely used page builders, Divi and Elementor also share similar feature lists, making it difficult to decide which one to choose. On paper, they both look great, but, as is often the case, the small details and differences will dictate which one is best for you.
To help you to pick the right tool, this article compares the features and user experiences of Divi and Elementor, so you can make an informed decision on which one to use for your project.
Let’s begin…
About Divi and Elementor
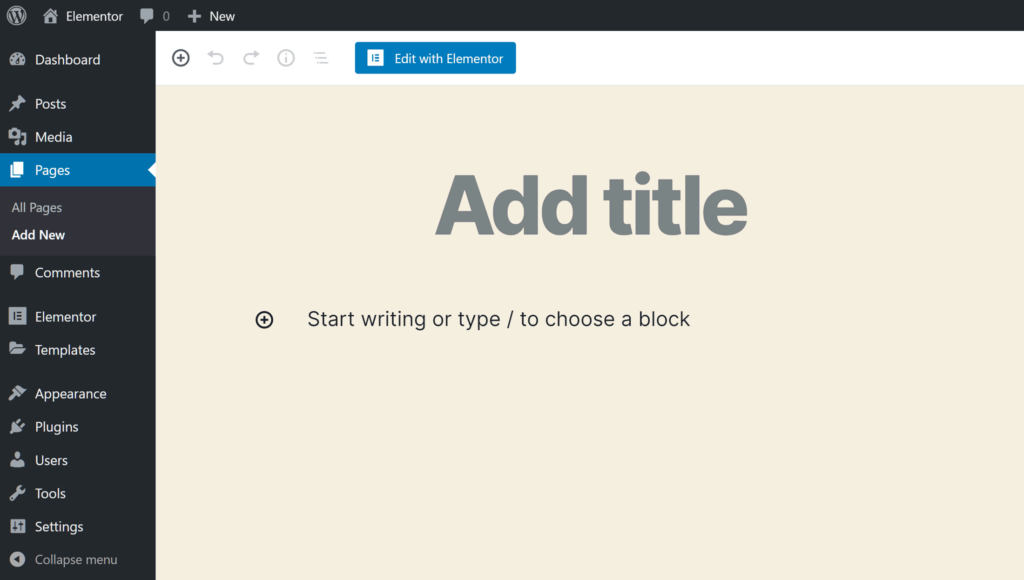
Installing a page builder plugin such as Divi or Elementor gives you full creative control over how your posts, pages and other types of content look.
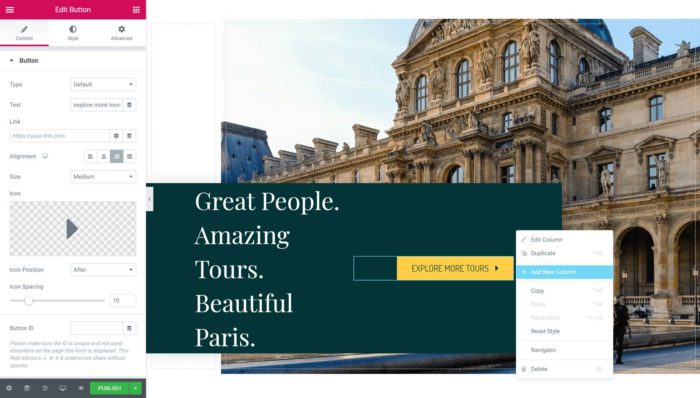
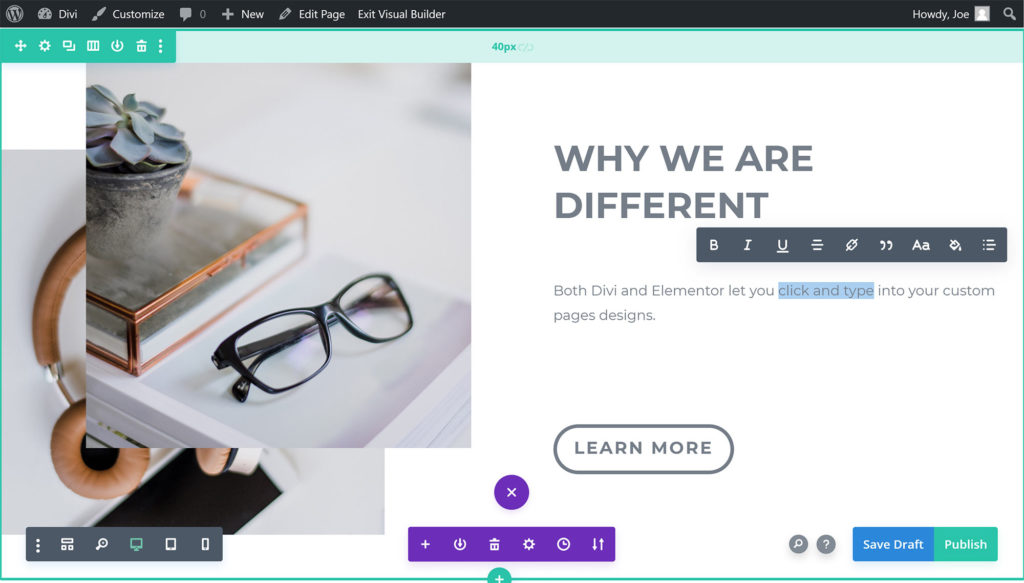
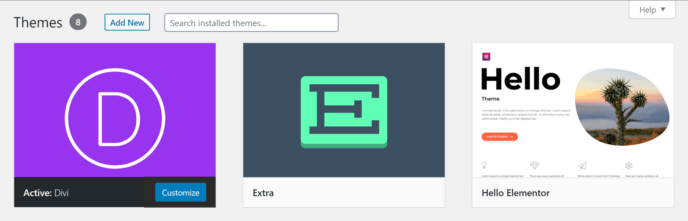
Both Divi (pictured) and Elementor give you a new way to create content in WordPress.
Not only that, but the paid versions of these two plugins allow you to customize the header, footer and other parts of your site outside of the post and page areas.
As Elementor is available in two main varieties — one a free plugin and the other a paid tool with additional features — we’ll be covering both options in this comparison. Because of this, you’ll be able to decide if the free version of Elementor will suffice for your website, or if investing in Divi Builder or Elementor Pro is a better option.
For Divi, we’ll be looking at the standalone Divi Builder plugin from Elegant Themes that’s also available as part of the Divi WordPress theme, also from Elegant Themes.
DIVI AND ELEMENTOR OVERVIEW
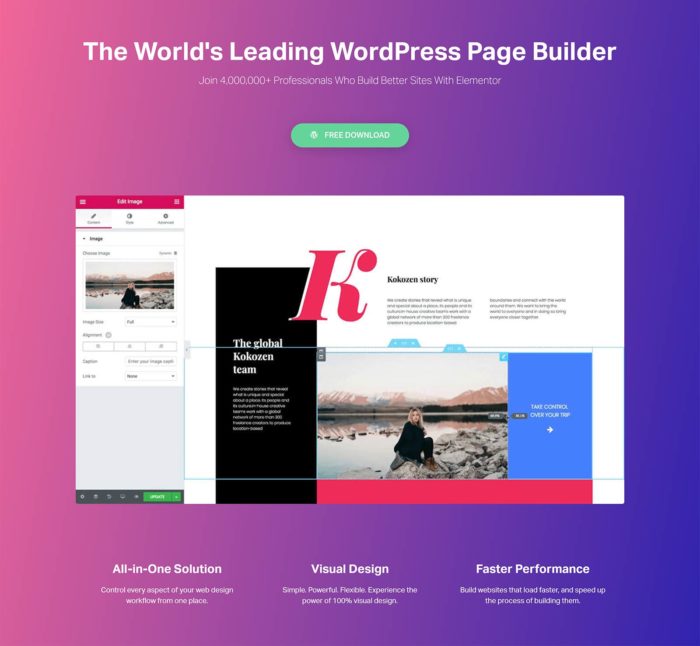
The key features of Divi and Elementor (pictured) are their drag-and-drop visual interfaces.
This guide will look at Divi and Elementor in detail. However, to give you a quick overview of what these tools can do, here’s a list of their key features:
Libraries of high-quality homepage and inner page templates.
Ability to customize all areas of your website, including the header, footer and theme templates.
Customizable elements for adding a range of content to your pages.
Ability to create reusable templates and page elements for use throughout your site.
Role managers to control who can do what with the page builders on your website.
While these page builders may have similar capabilities, their features have been implemented in different ways. Because of this, it’s difficult to evaluate and compare them simply by looking at their feature lists.
However, by the time you’ve finished reading this comparison, you’ll know whether Divi or Elementor is the right page builder for your website.
Before we get to the in-depth exploration and comparison of their features and user experiences, here’s the key information about each plugin.
ABOUT DIVI
The Divi Builder started life as a content editor integrated into the Divi WordPress theme. Now, though, that page builder is also available as a standalone WordPress plugin for use with any WordPress theme, and it’s the product we’re looking at for this comparison.
The Divi Builder is available as a standalone WordPress plugin, or as part of the Divi theme.
While the page builder is now available as a plugin, if you’re yet to choose a theme for your WordPress website, and you like the sound of Divi Builder, you could kill two birds with one stone and install the Divi theme to apply a high-quality theme to your WordPress website and also gain access to the page builder.
We’ll cover the pricing details in more depth later in this page builder comparison, but both the Divi Builder plugin and Divi WordPress theme are available from Elegant Themes in a single package that starts at $89.
ABOUT ELEMENTOR
As mentioned, you can start using the Elementor page builder for free, or pay for Elementor Pro to access a more feature-rich version of the tool.
Elementor is available as a free version and a more feature-rich premium version known as Elementor Pro.
While installing either plugin gives you access to the same page builder interface, Elementor Pro includes more templates and modules, plus a few additional features to help you to customize all of your WordPress website, create pop-ups, and integrate with lots of third-party services. There’s also a free theme for Elementor that can be used if you’ve yet to choose one for your website.
You can read a breakdown of the differences between Elementor Pro and the free version on the Elementor website.
Divi vs Elementor Features Compared
Both plugins aim to solve the same problem — making it easy to create a custom WordPress website — and therefore they share similar feature lists. So, to help you to decide which one to choose, here’s a comparison of their key features.
EDITABLE CONTENT TEMPLATES
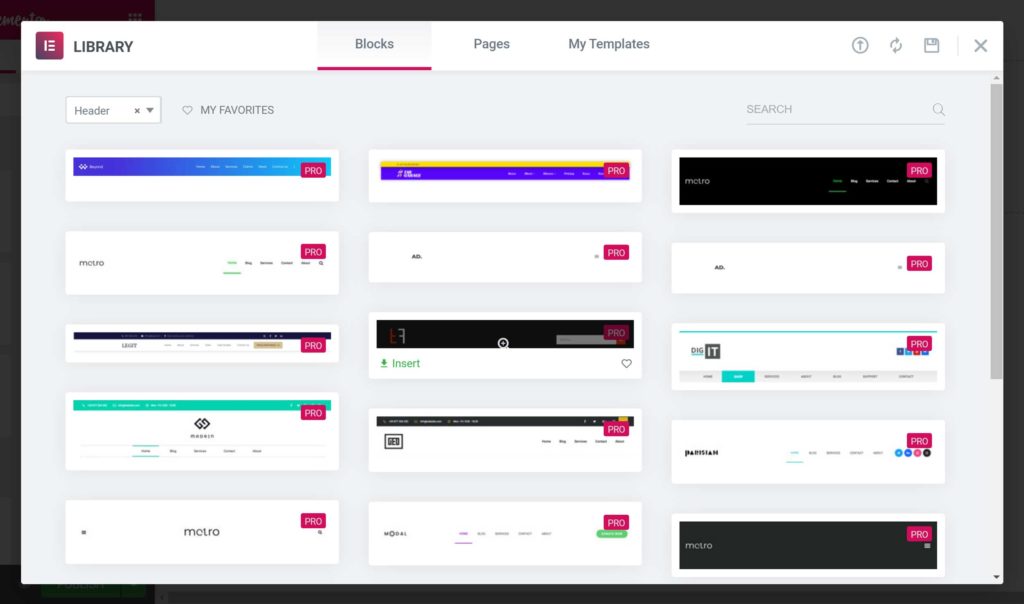
Both Elementor (pictured above) and Divi come with hundreds of high-quality editable templates.
While it’s great that both plugins let you create your own custom page designs from scratch, doing so can be time-consuming, not to mention quite difficult, if your design abilities aren’t up to much.
Thankfully, Divi and Elementor Pro, and, to a lesser extent, the free version of Elementor, are packed with high-quality templates. You can use the templates as they come and just make a few edits to their text and images, or completely customize them so they become unique designs.
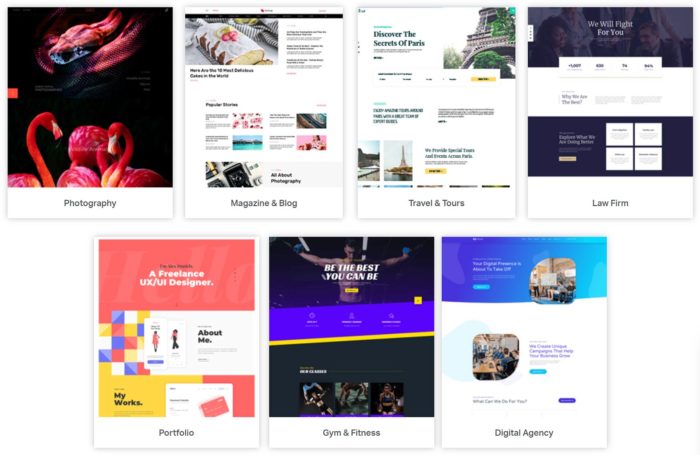
Some examples of the types of templates you get access to with both plugins include:
corporate and business-focused website templates
marketing, design and SEO agency templates
many different ecommerce store templates
lots of service provider and freelancer templates
online portfolio templates
blog templates, covering food, travel and health topics
multiple sales-focused landing page templates.
As you can see, whatever type of website you’re planning, or piece of content you need to create, you’ll probably find a template that’s ready to go.
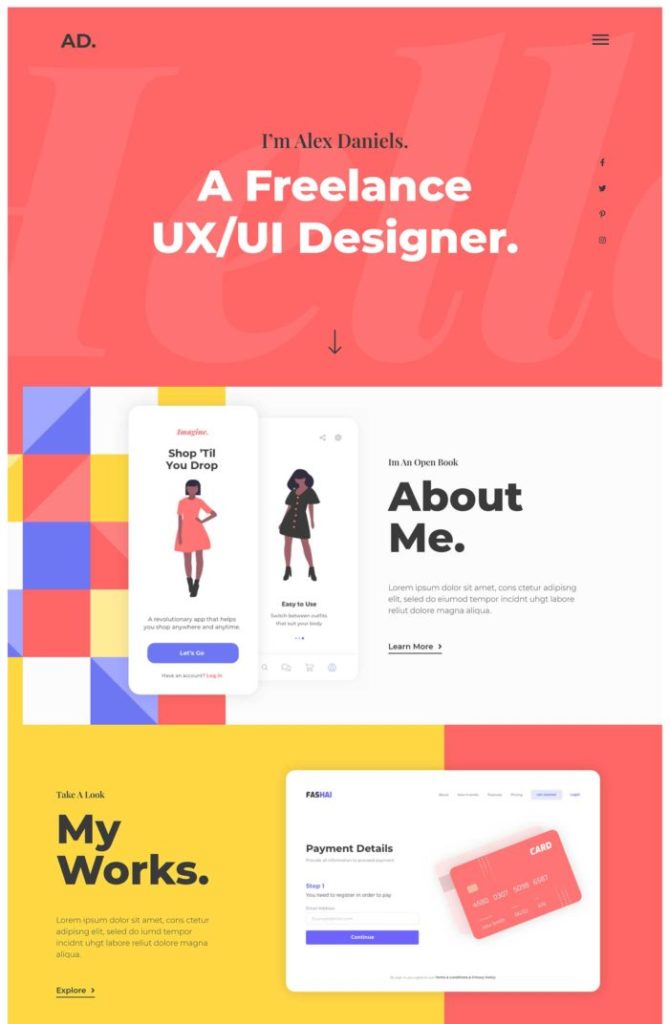
An example of one of the editable Divi layouts.
If not, there should be one that’s a close match that you can adjust to meet your requirements.
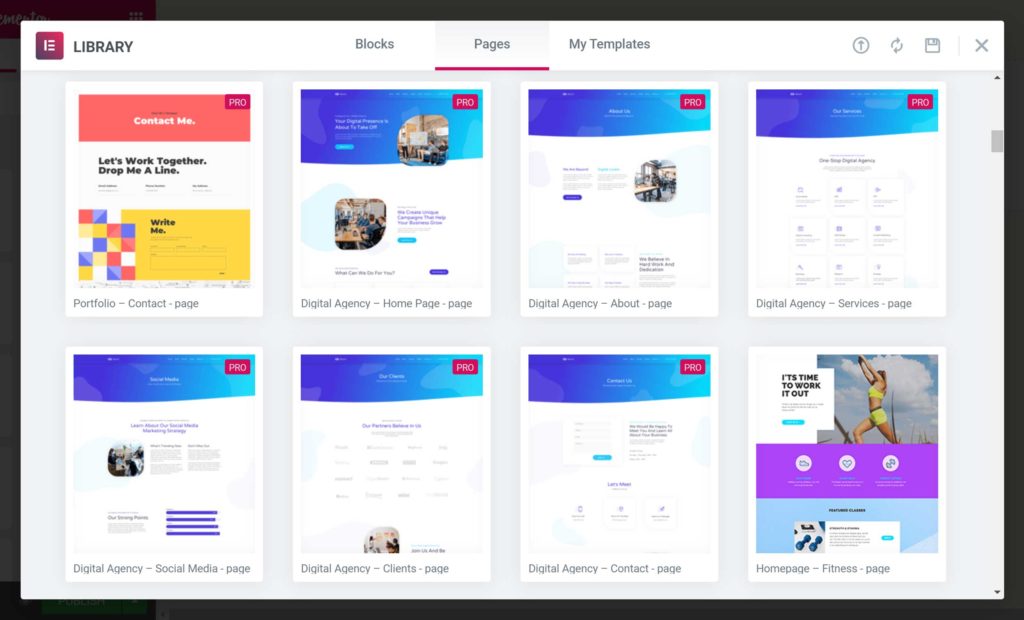
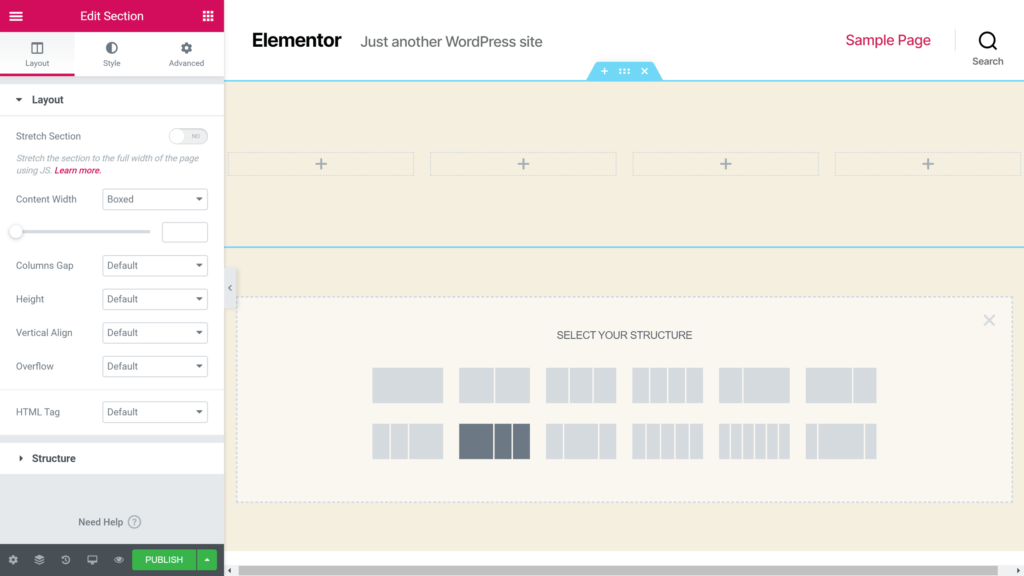
When it comes to the number of templates you get access to with each of these page builder plugins, Elementor Pro has an impressive 150-plus templates, while Divi takes things even further with more than 1,100 layouts. The free version of Elementor only has around 40 templates, but you may find the one you need among this smaller selection.
However, while it’s easy to focus on the numbers, it’s worth mentioning that it’s best to choose the plugin with the most templates that are right for your project, rather than the one with the most options overall.
TEMPLATE ORGANIZATION
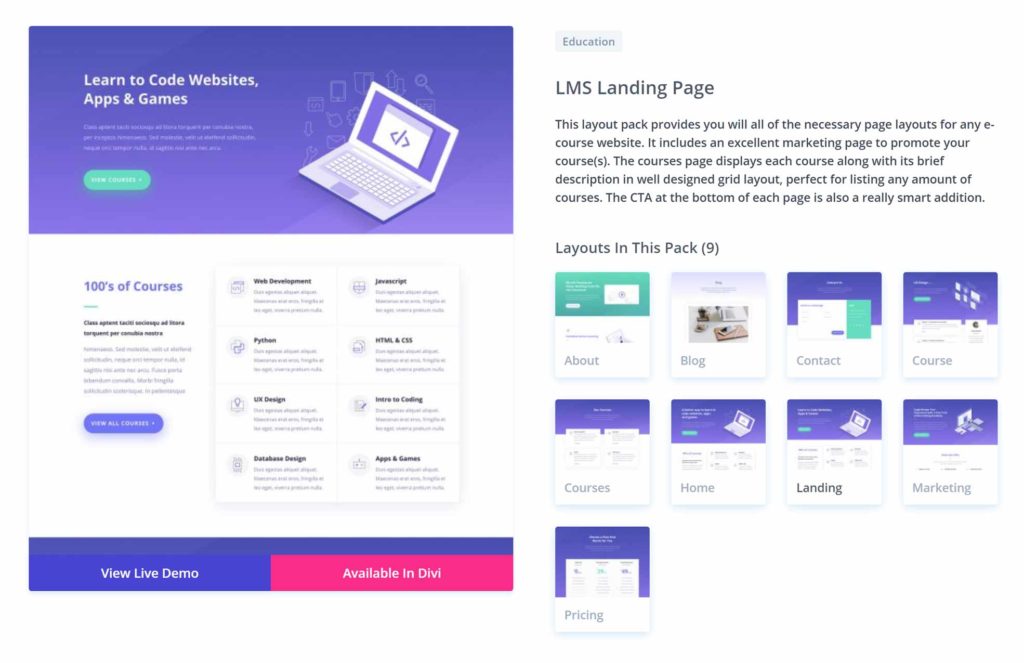
To help make its constantly expanding template library more manageable, the Divi layouts are organized into website packs. Each pack typically includes a homepage template, as well as layouts for adding other content to your site, such as the about, contact and landing pages, as well as blog posts and portfolios.
The Divi templates are organized into packs that contain multiple layouts for creating a specific type of website.
The Divi layout packs are useful, as they provide you with most, if not all, of the templates you’ll need to launch your site. However, you’re free to mix and match the templates from the different packs to create your own custom site.
With Elementor, the templates aren’t as clearly organized into website packs, making browsing the library less convenient than it is with Divi. However, there are a few sets of templates that have all been designed for the same purpose, such as a series of layouts for creating a digital agency website or an online portfolio.
Both plugins make it easy to import their templates into your posts and pages.
With both plugins, importing the templates is very straightforward, enabling you to quickly lay the foundation for your new site or add extra pages to your existing site.
CONTENT TEMPLATES SUMMARY
An example of one of the editable Elementor Pro templates.
Regardless of whether you choose Divi or Elementor Pro, you’ll get access to lots of high-quality templates for creating all types of websites and adding individual pieces of content to your site.
Thanks to Divi’s website pack system, it’s easier to quickly find and import a collection of templates that have all been designed for the same project.
With Elementor, there are a few website packs, or kits as they call them. However, most of the Elementor templates are individual layouts designed for adding a single page to your site, rather than building an entire website.
While you get a good amount of templates with both plugins, the best way to decide which page builder is right for you in this regard is to browse their libraries (view the Divi and Elementor libraries) and see which are more relevant for the type of website you’ll be creating.
PAGE BUILDER FEATURES
We’re just about to look at the page builder interfaces of Divi and Elementor to demonstrate the content creation process and user experience of both plugins.
However, before we explore how they work, here’s a quick rundown of some of the best features of the Divi and Elementor page builder interfaces:
Ability to drag and drop elements around the page.
Ability to undo and redo actions and view the page editing history.
Ability to heavily customize any of the elements that make up your page.
Ability to preview page designs in a range of viewports, including smartphone and tablet views.
Ability to create reusable content elements that you can quickly insert into multiple pages.
As the list of features above shows, you can do a lot more with these tools than you can with the standard WordPress editor.
Now, let’s take a look at what it’s like to use these plugins to build a custom page design for your WordPress website.
PAGE BUILDER INTERFACES
As mentioned, both Elementor and Divi add a new interface to your WordPress website that you can use to create custom designs and layouts for your posts, pages and other content.
Both plugins add a button to the WordPress editor that lets you use their page builders to create content.
Once you click on the button to launch the page builder, you can start using the drag-and-drop interfaces of Divi and Elementor to do much more than you can with the default WordPress editor.
These page builders replace the default WordPress editor with a custom content editing user interface.
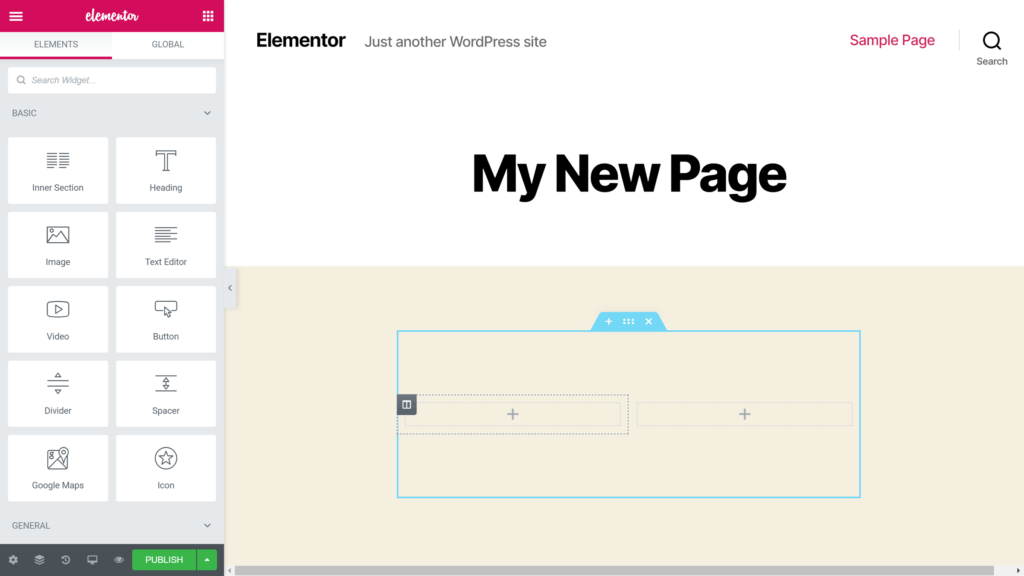
When it comes to creating a custom page design, both plugins use row and column-based structures to enable you to build your layout. Each page can have multiple rows, and each row can include multiple columns, giving you lots of freedom when building your pages.
Both Elementor (pictured) and Divi use rows and columns to build the page layout structures.
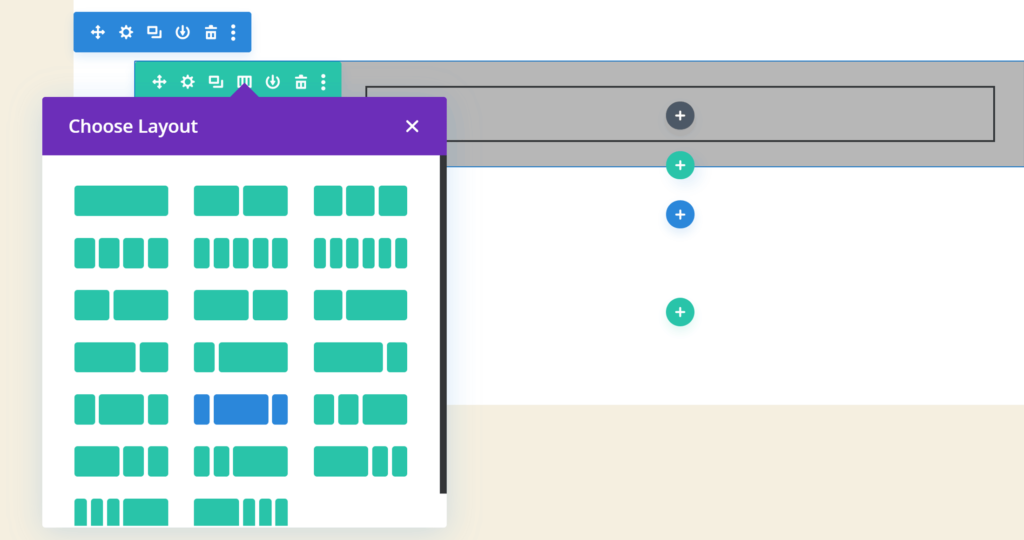
As both plugins include a good selection of pre-defined column layouts, you can quickly start building the structure of your page.
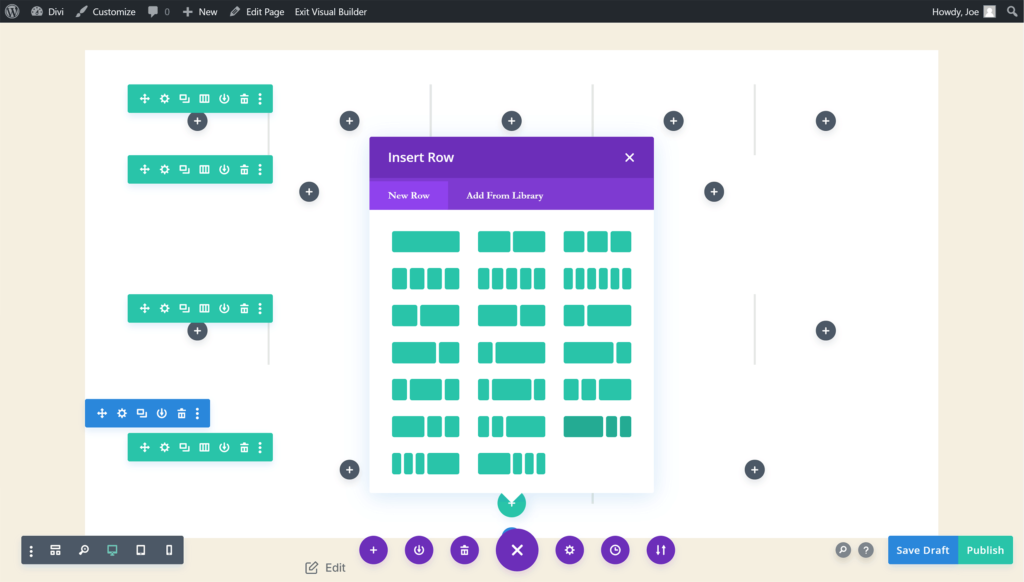
Divi does have a few more pre-defined column layouts to choose from when adding a new row to your pages.
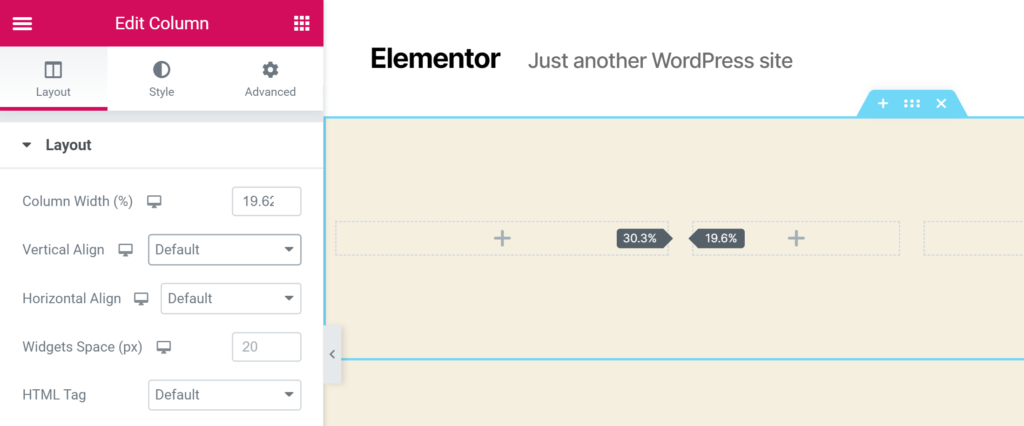
If you want to adjust the column distribution, you can do so easily with Elementor by simply dragging the column border to increase or decrease its width.
Unlike Divi, Elementor (pictured) lets you drag the column borders to give you full control over the width of your columns.
While you can’t drag the column borders to resize them in Divi, you can switch the pre-set column structure of a row that’s already been added to your page, changing it to a different column distribution. This does limit your options slightly, but you should be able to find a pre-defined layout that’s a match, or at least very close, to your requirements.
Divi lets you change the column structure of rows you’ve already added to your page.
Due to the row and column-based structure, you’re not able to position your page elements anywhere you like, such as on top of each other or with slightly overlapping edges, as you can with a non-WordPress page builder tool, such as Instapage.
The non-WordPress, hosted landing page builder, Instapage, lets you stack items on top of each other, unlike the Divi and Elementor page builders.
Instead, with Divi and Elementor, your page content must work within the boundaries of the row and column structure you’ve created. For some readers, though, having the structure of a row and column-based layout to follow will be preferable to the total freedom of a tool such as Instapage.
The Divi Builder interface is very different from the standard WordPress editor interface.
However, that being said, whether you choose Divi or Elementor, you still have a lot of creative freedom when designing your pages.
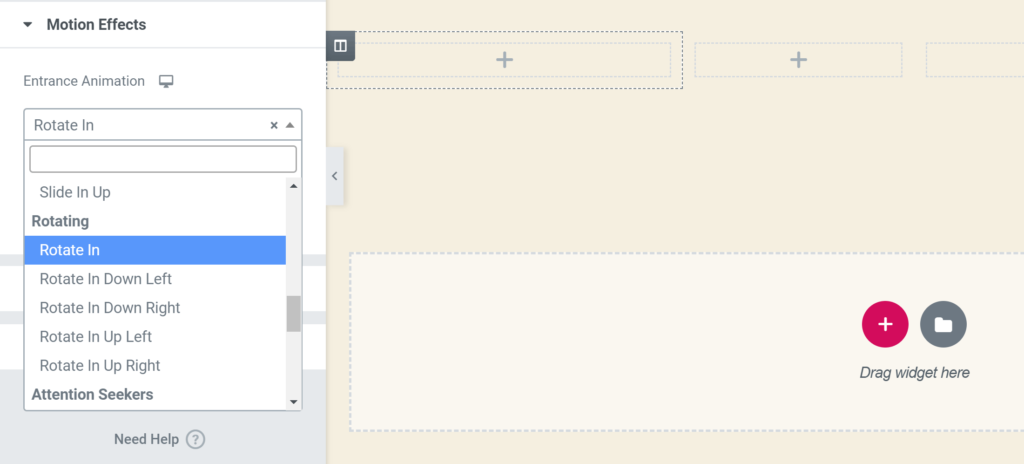
For example, both plugins give you full control over the appearance of your columns and rows, including the colors, borders, background displays and alignment. Like the other elements you can add to your pages with Divi and Elementor, you can also apply animation effects to your rows, such as slide-in or fade-in effects.
As well as applying animation and motion effects to your page elements, both plugins let you customize the appearance of the row columns and cells.
Once you’ve added one or more rows to your page, you can then start inserting the elements into your layouts to continue building your custom content design.
PAGE BUILDER INTERFACE SUMMARY
The user interfaces of both Divi and Elementor have come a long way since the early days of page builder plugins, and they’re also a significant departure from the standard WordPress content editing experience.
Because of this, getting the most out of either tool will require a period of learning and adjustment. Even those who are experienced WordPress users, but aren’t familiar with its modern page builder plugins, probably won’t be able to do exactly what they want with these tools right away.
However, with a bit of persistence and some trial and error, you should be able to create the kind of content designs that just aren’t possible with the default WordPress editor.
One useful feature that Divi has and Elementor doesn’t is its wireframe mode. Switching to this view in the page builder hides the content of the page, revealing the underlying structure. This makes it easier to see how the page was built and which modules it contains. Elementor does have a similar Navigator feature, but it’s not quite as helpful.
Unlike Elementor, Divi gives you the option of switching to wireframe mode to get a clearer view of the page structure.
Out of the two tools, Elementor is probably easier to use. Its user interface isn’t quite as unique as Divi’s, and therefore it has less of a learning curve.
WIDGETS AND MODULES
To help you to create effective pages for your website, both plugins include impressive selections of widgets and modules that you can insert into your layouts via the page builder interfaces.
With the free version of Elementor, you get access to 30 basic widgets, while the pro version of the plugin includes more than 40 additional advanced widgets. Divi users can add 40 modules to their pages.
The modules and widgets of both plugins are all highly customizable too, so you get full control over how they look once they’ve been added to your pages.
Some examples of these modules:
Buttons and calls-to-action
Price tables
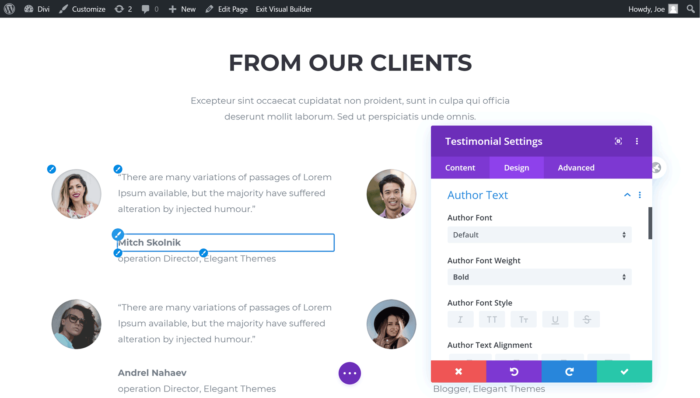
Testimonial carousels
Blog post lists
Portfolio content grids
Countdown timers
Video players
There’s a lot of crossover when it comes to the modules you get access to with both of these tools, and any that are in one plugin but aren’t in the other shouldn’t be deal-breakers, such as the flip boxes of Elementor that aren’t in Divi or the filterable portfolio option of Divi that isn’t in Elementor.
When it comes to whether Divi or Elementor has a better selection of modules, it’s hard to declare one a winner. Elementor Pro has more than Divi, but it really depends on which elements you want to add to your pages.
WORDPRESS THEME OPTIONS
Both plugins should work with any themes that ‘respect the coding standards of WordPress set by its Codex’, but if you’ve yet to start your website and choose a theme, or if you’re looking for a new one for your site, Divi and Elementor both have their own themes.
As mentioned earlier, as well as the Divi page builder plugin, there’s also a Divi WordPress theme. The pricing section of this comparison includes all of the details about purchasing these tools — however, when you buy the Divi plugin, you also get access to the Divi theme. Therefore, if you’re creating a new WordPress website, you won’t have to worry about finding a suitable theme if you decide Divi is the best page builder for your project.
Purchases of the Divi Builder plugin come with the Divi and Extra WordPress themes, while the Elementor team have created a free theme for use with their page builder.
The Elementor team have produced a free theme called Hello Elementor that they describe as being ‘a plain-vanilla & lightweight theme’ for their page builder. There’s also a list of recommended free and premium third-party themes on the Elementor website.
Because of this, you don’t have to worry about finding a suitable theme with either Elementor or Divi, as they both provide you with a compatible option.
THEME BUILDERS
Typically, most page builder plugins only let you work on the post or page content, rather than the parts of your site that are defined by your theme, such as the header and footer areas, or the single blog post and blog archive templates.
However, after recent updates, both the Divi and Elementor Pro plugins now have a feature they describe as a Theme Builder.
What this means is that you can design custom headers and footers for your website, either starting from scratch or using their templates, and then assign that custom header or footer to all of your site, or to specific parts of it.
Elementor Pro has lots of header, footer and other templates for use with the Theme Builder feature.
With Elementor, creating the custom header area takes place in the page builder interface, giving you full control over how this area of your site looks, regardless of which theme you’re using.
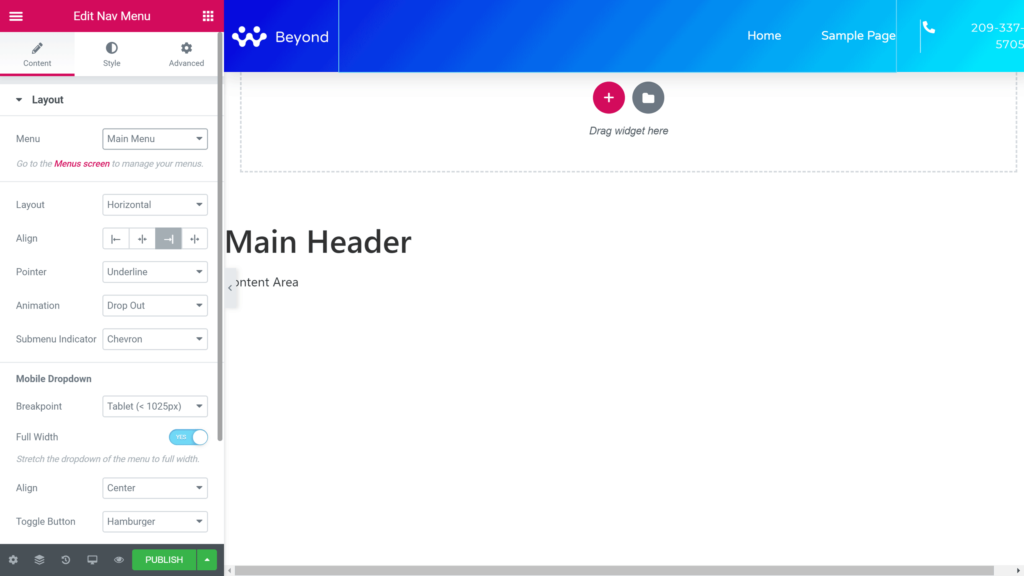
You can create the custom header and other theme elements in the Elementor page builder.
Dynamic content, such as the site logo and the menu to display in the custom header, can all be defined through the Elementor page builder interface.
The Divi Theme Builder works in much the same way as the Elementor Theme Builder, giving you control over all aspects of your WordPress website.
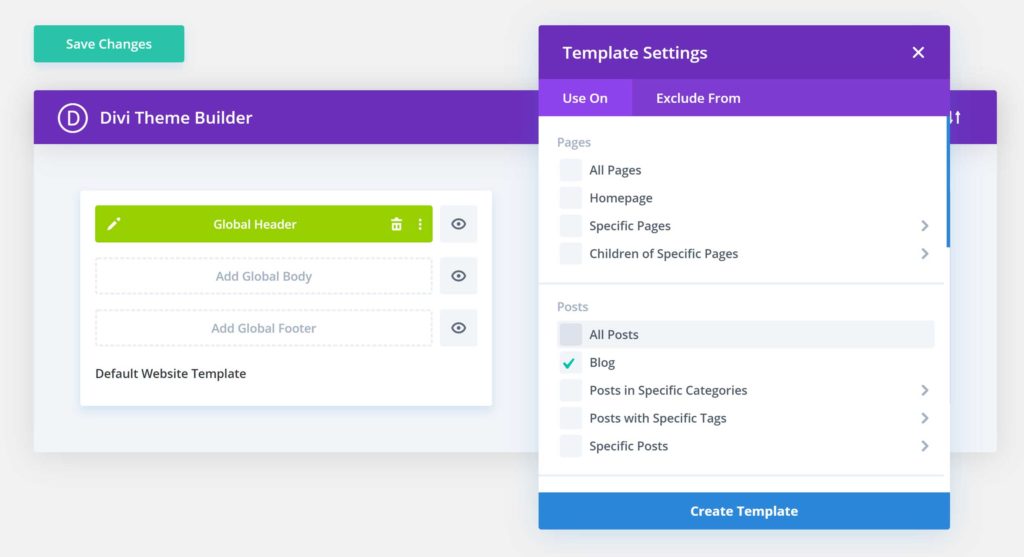
As with Elementor Pro, the Divi Theme Builder (pictured) lets you design custom theme templates through its editor, then control exactly when they’re used on your site.
Features such as the conditional publishing settings of both tools make it easy to automatically assign templates, such as a custom single post layout, to content from specific categories, for example.
If you want to design custom headers, footers, blog post templates and more, both Divi and Elementor Pro make it possible with their theme builder features. Both plugins have implemented this feature really well.
ADDITIONAL FEATURES
As well as having all of the essential features that make a great page builder plugin, such as a large set of high-quality templates and a powerful visual editor, Divi and Elementor have a few other features that are worth quickly mentioning.
DIVI LEADS
To take the guesswork out of creating custom page designs that convert against your website goals, such as encouraging your visitors to get in touch via a contact form, join your email list, buy a product or take some other action, Divi has a tool that can help you to optimize your content.
That tool is Divi Leads, and it’s integrated into the page builder, allowing you to run split tests by creating multiple versions of a page element, such as a button or headline. Divi Leads will then show the different versions of that element to subsets of your audience.
While the test is running, the audience interactions with the different versions of the elements are tracked, enabling you to clearly see which one delivers the best results against your goals. Once you’ve created the variants of your page that you want to test, the whole process of running the experiment and collecting data is very hands-off.
While you may think your custom page designs look great, Divi Leads can tell you if they’re actually effective at helping you to convert against your goals.
Although Elementor doesn’t have a split-testing feature, it can be integrated with Google Optimize, giving you a way to run A/B testing on your custom content. However, having this functionality integrated into your page builder, as is the case with Divi, does make optimizing your custom designs easier and more efficient.
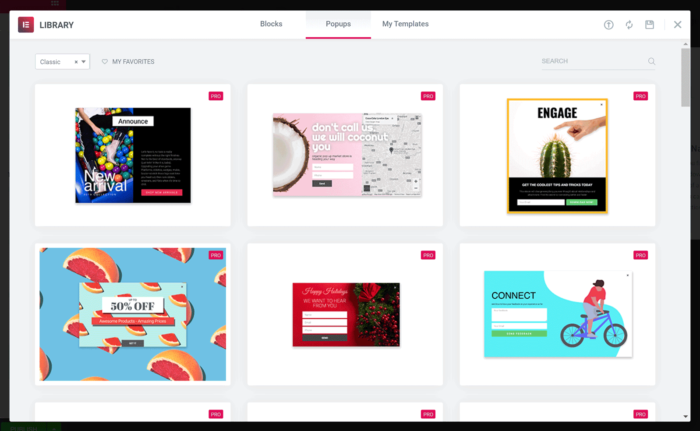
ELEMENTOR POP-UPS
Elementor Pro has a pop-up builder feature with its own set of templates that you may find useful.
A feature that Elementor Pro has that Divi (and the free version of Elementor) doesn’t is a pop-up builder that lets you create your own eye-catching pop-ups, fly-ins, hello bars, full-screen displays and more — all through the Elementor page builder interface.
If you want your visitors to perform a specific action on your website, or view an announcement, pop-ups and their variants are a great way to grab their attention.
While Divi doesn’t have a built-in pop-up creation feature, purchasing Divi does give you access to the pop-up and email optin plugin, Bloom, a useful tool we’ve reviewed in the past. However, once again, having the functionality integrated directly into the page builder plugin, as is the case with Elementor, is more convenient than using a separate tool.
COMMUNITY
Elegant Themes has done a great job of fostering a community around its products, including the Divi Builder plugin. Its website has one of the busiest blogs about WordPress, with lots of useful content for Divi users.
Furthermore, there are also in-person meetups held all around the world, where you can connect with other Divi users. The official Divi Facebook group, as well as the many unofficial ones, gives you another place to get support and inspiration for your projects.
The Elementor community also includes in-person meetups, busy Facebook groups, and a place for developers to collaborate on the plugin.
ADD-ONS AND UPGRADE OPTIONS
As both Divi and Elementor are very popular page builders, a number of third-party add-ons have been created for these plugins. Some are free add-ons while others are paid extensions. However, if you discover that there’s something you can’t do with either Divi or Elementor, there’s a good chance you’ll be able to find an add-on that brings this functionality to the page builders.
Where to find add-ons for Elementor and Divi:
Elegant Marketplace lists free and paid add-ons from a range of sources.
If you can’t find an add-on that addresses your issue, it’s possible you could code one yourself or hire a developer to build it for you. In fact, there’s a lot of information for developers who’d like to create solutions for their page builder on the Elementor website.
PRICING OPTIONS
Here’s a quick overview of the pricing options for these plugins before we break down exactly what you get for your money:
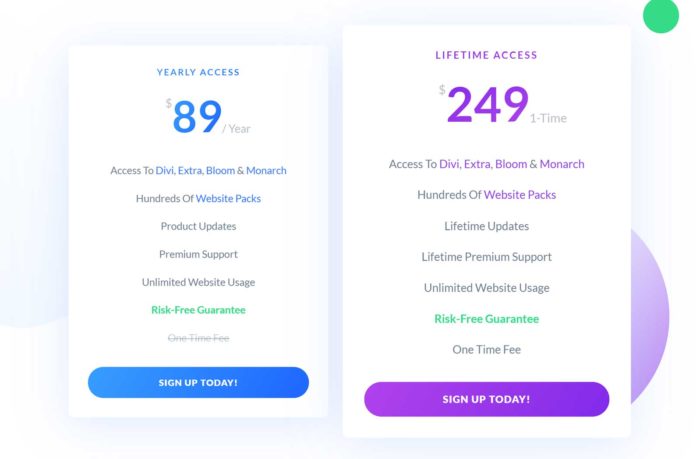
Divi Builder: $89 for a one-year license or $249 for a lifetime license, with both options providing you with access to additional plugins and themes from Elegant Themes.
Elementor: Free version available, while the Elementor Pro licenses start at $49 a year.
As you can see, the Divi Builder plugin comes with the other products from Elegant Themes, so, when you purchase Divi Builder, you also get access to the Monarch social sharing plugin. Both license options include access to the same sets of features of Divi Builder and the other products from Elegant Themes.
Divi Builder is available on two pricing plans.
Regardless of whether you choose the one year or the lifetime license, you can use the Elegant Themes products on an unlimited number of websites.
The price of Elementor Pro depends on how many sites you want to use the plugin on.
With Elementor Pro, the $49 license allows usage on a single website, with the more expensive options covering greater numbers of sites. Other than that, the Elementor Pro licenses are the same, giving you access to all of the features of this plugin, regardless of which option you choose.
Both Divi Builder and Elementor Pro have 30-day money-back guarantees, so you can try them risk-free.
Final Thoughts
Both Divi Builder and Elementor Pro are exciting and impressive content editors for WordPress. Not only do they give you full control over your posts and pages, but also the headers, footers and other areas of your website. The creative potential for your site with either tool is almost unlimited.
Regardless of which one you choose, you won’t be disappointed.
However, to help you to make a decision, check out their templates to see which plugin has more options that you’re likely to actually use.
Viewing the selection of modules is a good idea, too, just in case there’s a particular element that you want to add to your site that isn’t included in Divi or Elementor.
When it comes to ease of use, the Elementor interface is probably the easier of the two to get started with. So, if you don’t have the time or inclination to learn a totally new system, Elementor may be better for you than Divi with its unique user interface.
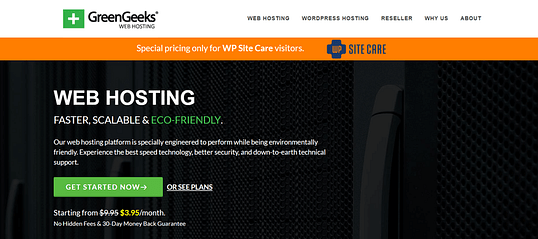
There’s a lot to consider when choosing a web hosting provider. You need to find one that’s reliable, offers excellent performance, fits into your budget, and much more. However, what if you’re also concerned about the impact of your site on the environment? In our GreenGeeks review for WordPress, we’ll share one potential solution!
GreenGeeks is a hosting platform that prides itself on delivering eco-friendly service at affordable prices and offers a WordPress-specific plan with lots of features. It’s an appealing option for the environmentally conscious, but you may wonder whether its performance is up to par.In this comprehensive GreenGeeks review for WordPress, we’ll go over everything you need to know in order to make an informed decision about whether to sign up.
GreenGeeks review for WordPress – specific features
GreenGeeks offers both standard and WordPress-specific hosting options. As its name suggests, GreenGeeks’ key selling point is that it aims to provide an eco-friendly service. It achieves this both by designing its platform to be extremely energy efficient and by investing heavily in renewable energy.
This is great news for the eco-conscious. However, it’s also important that the hosting itself is top-notch. This means we need to conduct a thorough GreenGeeks review for WordPress.
Fortunately, this service includes a number of useful features for WordPress users, including:
A one-click install option, to get your site set up quickly.
Automatic updates, so your site remains secure and stable over time.
WordPress-optimized security features, such as WordPress Protect.
Overall, GreenGeeks has covered all the necessary bases when it comes to general and WordPress-specific features.
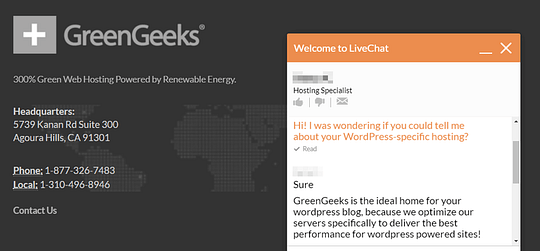
Phone support is available throughout the week and on weekends, and email tickets boast a fast resolution time. As for the live chat, it’s available every day of the year, 24/7.
We tested out the live chat personally:
The support staff were friendly and helpful and seemed able to answer our WordPress questions easily. Even better, we got a response within a few seconds each time.
If you prefer to figure things out on your own, GreenGeeks also offers a variety of support documentation. There’s a knowledge base with some helpful articles, although it’s admittedly a bit sparse. The detailed website tutorials are more helpful, however, and there’s also a blog you can check out with both informative and instructional content.
Performance
Now, we come to perhaps the most important section in our GreenGeeks review for WordPress. Excellent performance is essential if you want to provide a quality user experience on your site. Your hosting provider has a huge impact in this area, so let’s see how GreenGeeks stacks up.
It offers a number of features designed to keep your site fast. For example:
Finally, GreenGeeks offers several data centers, which are based in the following locations:
Chicago, US
Pheonix, US
Toronto, CA
Amsterdam, NL
As you can see, this provider doesn’t offer much in the way of global data centers. You can offset this downside by using Cloudflare or another Content Delivery Network (CDN), but it still means that GreenGeeks is most applicable for sites with a largely North American audience.
Page speed tests with Pingdom
Of course, excellent performance in theory doesn’t always translate to reality. So we tried GreenGeeks ourselves, setting up a basic website and testing its loading times.
We got the following results by using Pingdom to run tests from three different servers:
San Jose: 2.70 seconds
New York: 1.60 seconds
Stockholm: 0.87 seconds
As you can see, the results were mostly good, although there’s a lot of variation between locations. The Stockholm time was excellent, for example, but the San Jose test was surprisingly slow.
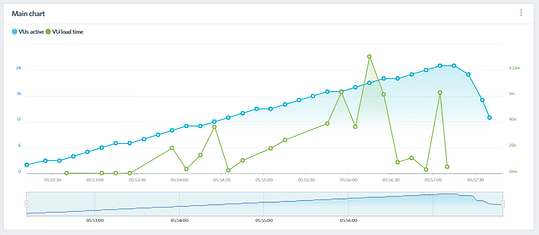
Page speed tests with Load Impact
To get a closer look at our GreenGeeks site’s performance, we also tested it on Load Impact. This tool puts more stress on the site, simulating the impact of many concurrent users. Our results were as follows:
Load Generator: Frankfurt, DE Test Server: Amsterdam, Netherlands Minimum Response Time: 0.16 seconds Maximum Response Time: 111 seconds
These response times are very inconsistent, and in some cases very high. Ideally, you want the green line to remain flat (and low) as the number of visitors (the blue line) increases. As you can see, this wasn’t the case in our test.
However, keep in mind that this test is a simulation, meaning that while it does attempt to replicate a real use case scenario, it’s not entirely accurate. The huge times reported by Load Impact might be a result of GreenGeeks’ mechanisms for spam protection or other such measures. Still, we’re hesitant to recommend GreenGeeks in regards to performance.
Pricing
GreenGeeks keeps things simple in terms of pricing. There’s a single WordPress hosting plan, which will cost you $9.95 per month (or as low as $3.95 per month, if you sign up for three years’ worth of service). When it comes to WordPress hosting, there are cheaper options, but this is still on the affordable end.
Fortunately, GreenGeeks is fairly generous about what it provides with this plan. You’ll get space for unlimited data, domains, and databases, access to a free Secure Sockets Layer (SSL) certificate, and quite a bit more. This makes GreenGeeks a flexible service that provides you with everything you need to get started, and offers more than enough resources for small to medium-sized sites.
Overall pros and cons
At this point, let’s take a moment to sum up the most important advantages and drawbacks of this service:
Pros
Offers an eco-friendly service that offsets your website’s footprint by investing in renewable energy.
Includes plenty of WordPress-specific features.
Provides a lot of options and resources for a reasonable price.
Cons
Performance appears to be inconsistent.
Is less suited to sites based internationally because most of its data centers are in North America.
Conclusion
Overall, GreenGeeks is an intriguing option if you’re looking for a hosting provider offering something unique. Its WordPress plan is fairly cheap, provides plenty of resources and features, and comes with lots of helpful support. Your mileage may vary when it comes to performance, however, which is worth bearing in mind.
SiteGround is one of the most popular web hosting services available on the market today. It’s a safe and reliable way to host your website in 2019.
More than 2 million active domains are hosted with SiteGround.
One of the reasons why this service is so popular is because they offer hosting options and plans suitable for a wide range of websites and businesses.
Small personal websites, business websites, and large ecommerce sites alike can all use SiteGround.
For those of you who are looking to find a hosting provider for your new website, SiteGround is definitely a top option for you to consider.
It’s also a great choice for anyone who wants to switch hosting providers for their existing website since SiteGround has plans with a free site transfer. But we’ll talk about this in greater detail as we continue.
I’ll give you a better understanding of the plans, types of hosting, and top benefits offered by SiteGround. You can use this guide to make an informed decision to determine if SiteGround is the best web hosting plan for your needs.
Benefits of Using SiteGround Web Hosting
There is plenty of upside to using SiteGround as a web hosting service. I just want to quickly highlight and explain why this platform stands out from its competitors.
High uptimes
When it comes to measuring how good a web host is, uptime is the ultimate metric. By definition, this is the amount of time that a server stays up and running.
A recent study shows that SiteGround has exceptionally high uptimes, on average, over a twelve-month stretch.
In 2018, SiteGround ranked fourth compared to other web hosts judging by average uptime. As you can see, they were just barely beat out for the third place spot by a one-thousandth percentage point.
Overall, the average uptime for the 32 shared web hosting services in the study was 99.59%. SiteGround was significantly higher than the average and near the top of the list.
High uptimes ensure that your site will nearly always be up and running around the clock.
Fast load times
Just because your site is up, it doesn’t always mean that it will be fast. But take a look at the response time for this SiteGround test website that was set up by Hosting Facts.
We already talked about the great uptime, but now you can refer to the response time column.
The average response time for the first six months of 2019 was 662 ms. That’s phenomenal. In addition to using a good web host, you should also know the other top principles that boost website loading times.
Great customer support
Hopefully, you don’t have any issues with SiteGround. But in the event that you run into a problem, have a question, or need some assistance, it’s nice to know that they provide excellent customer support.
You can access phone support as well as live chat 24/7. As I mentioned earlier, you’ll have priority support if you have a GoGeek plan. This means that you’ll be connected with the most experienced SiteGround technicians whenever you need help.
Free features
Web hosting services will always try to hit you with add-ons at an upcharge. But SiteGround throws in some great features at no extra charge.
Your membership comes with one free site migration. This can be done with their migrator plugin, which we talked about earlier. If you have the GrowBig or GoGeek plan, a SiteGround professional will do the migration for you.
SiteGround plans also come with a free CDN and free SSL certificate.
Cloudflare CDN keeps images, videos, and other large files off of your server. As a result, your server is always fast. Since SiteGround users servers all over the globe, the CDN makes sure that files are stored closer to website visitors for fast delivery.
The SSL certificate is required for all websites. It protects private information being transmitted between devices and websites. SiteGround throwing this in for free is a nice touch since you’d need to get one regardless.
Flexible
Nearly any website can be hosted on SiteGround.
It’s a great web hosting service for beginners and experienced users alike. You don’t need to be too tech-savvy to understand how the platform works and get your site hosted. But on the other hand, if you like to be more hands-on with the server and take advantage of certain features, SiteGround has plans with you in mind.
There are also enough options on SiteGround to accommodate different web hosting needs, such as shared hosting, dedicated server hosting, and cloud hosting.
They have plans suitable for a wide range of average site traffic as well. So as your website scales, you can always upgrade to a plan that will meet your needs.
Money back guarantee
SiteGround offers a 30-day money back guarantee for their shared hosting plans. This shows that they stand behind the services that are offered.
Dedicated servers and cloud hosting plans have a 14-day money back guarantee, which is still enough time to tell if you’re happy with your service.
SiteGround will also refund you if they fail to meet a 99.9% uptime rate. This is clearly written in their terms of service.
This relates back to what we talked about earlier, in terms of their high uptime rates. There’s a reason why it’s so high—SiteGround has a promise to stand behind.
Other considerations
There’s no such thing as a perfect web hosting service. While SiteGround is great, there are a few downsides that you should be made aware of before you proceed.
Setup fee
SiteGround charges a one-time setup fee for $14.95 with all of their plans. It’s not a deal breaker by any stretch, but it means you can’t just sign up for their lowest plan and be out the door for $3.95.
Renewal rates
At first glance, SiteGround’s pricing is very attractive. But those are only promotional rates.
When you renew, your rates will jump as follows:
$3.95 to $11.95 per month
$5.95 to $19.95 per month
$11.95 to $34.95 per month
The cost essentially triples across the board. So I’d recommend locking in the longest contract possible when you first sign up, which is 36 months. This will guarantee you a low rate for a while before you’re forced to renew.
Limited budget plan
For those of looking for the best cheap web hosting service, SiteGround’s StartUp plan for $3.95 per month is definitely attention-grabbing.
It’s a great choice for those of you with smaller websites, but it’s fairly limited for anyone who plans on getting more than 10,000 visitors per month. You may have to upgrade faster than you anticipated if you start with their lowest priced web hosting plan.
Compare SiteGround Web Hosting Plans
Like most web hosting services, SiteGround offers different plans for websites with varying needs. In this case, there are three tiers for most of their hosting types.
With the exception of cloud hosting and dedicated server hosting, the prices of these three plans will remain the same across the board for shared hosting, WordPress hosting, and Woocommerce hosting. We’ll dive deeper into those plans later in this guide.
For now, I’ll focus on the pricing and features of the three most popular plan options offered by SiteGround.
StartUp
As the name implies, the SiteGround StartUp plan is ideal for new websites. With rates starting at $3.95 per month, this plan is suitable for websites with less than 10,000 monthly visits.
You can only host one website with the StartUp plan, and it comes with 10 GB of web space. Other top features include:
Free site builder
Free SSL and HTTPS
Free email accounts
Free CloudFlare CDN
It’s a basic plan, but definitely appropriate for new websites that are starting from scratch. For those of you who want more features and better performance, you’ll need to upgrade. You’ll also outgrow the StartUp plan as your traffic increases (which is a good thing).
GrowBig
The GrowBig plan starts at $5.95 per month. This is ideal for medium-sized websites averaging up to 25,000 monthly visits. GrowBig has 20 GB of web space and can host an unlimited number of sites.
Unlike the StartUp plan, GrowBig has enhanced caching ability. The SiteGround Supercacher has three levels.
Level 1 — Static content caching
Level 2 — Dynamic data caching
Level 3 — Database queries caching
StartUp only caches at the first level, but GrowBig caches on all three levels.
If you sign up for the middle-tier plan offered by SiteGround, you’ll also get free on-demand backups, a free site transfer, as well as a staging feature for WordPress and Joomla sites. I’d say that the GrowBig plan will be suitable for most of you who are reading this guide.
GoGeek
GoGeek can accommodate up to 100,000 monthly visits and has 30 GB of web space. Obviously, this plan is made for bigger websites with high volumes of traffic.
Rates for GoGeek start at $11.95 per month, but the plan comes with all of the bells and whistles. In addition to everything that’s available in the GrowBig plan, GoGeek offers:
Advanced priority support (expedited customer service to the most experienced agents)
PCI compliant servers (necessary for those of you who process payments online)
Git pre-installed (for creating repositories on your site)
The name for this plan was inspired by technology geeks. So it’s made for those of you who want more control of your site. If you don’t understand some of the tech lingo that’s being mentioned in the GoGeek plan, it’s probably not for you. The only other reason why you’d need to upgrade to GoGeek is if you’re getting tons of monthly site traffic.
WordPress hosting
SiteGround offers hosting options specifically designed for WordPress users. This will save you time since you won’t need to manually download, install, and configure WordPress.
With SiteGround, you can take advantage of their automated process that’s as simple as clicking a button. This plan also makes it easier for you to customize your WordPress site by choosing a theme, picking your site functionalities, and installing marketing tools.
The WordPress Starter Kit from SiteGround is a great added feature for new WordPress sites. You don’t need any technical knowledge or experience to set this up.
If you have an existing WordPress site, SiteGround offers a free WordPress transfer. The SiteGround Migrator plugin takes care of everything for you. This is a secure way to transfer your site.
Alternatively, if you have a GrowBig or GoGeek plan, you can get your WordPress site migrated by one of the experts at SiteGround. This is a free service for one website before rates start at $30 per site.
WooCommerce hosting
SiteGround also has hosting options for ecommerce shops using WooCommerce.
The quick install and integration with WooCommerce is an easy way for you to create a professional theme for your online store. You can get the site up and running in minutes.
Just migrate your WooCommerce site using the migrator plugin. Just like WordPress hosting, WooCommerce migrations done by a SiteGround expert is free for one website if you’re on the GrowBig or GoGeek plan. Then you’ll have to pay $30 per each additional site.
If you have WooCommerce, you’re going to need to the GoGeek plan anyways, since that comes standard with PCI compliant servers.
Cloud hosting
Cloud hosting is a new way to host websites. The process uses multiple remote servers and is a great option for those of you who have websites that have outgrown the shared hosting plans.
With cloud hosting, SiteGround gives you guaranteed resources to meet your needs. Your own RAM and CPU won’t be shared with any other websites.
It’s also easy for you to scale your website with this type of web hosting.
You can upgrade your RAM, CPU, and disk space on-demand at any time. You don’t need to get approval to do this, and it happens without any website downtime.
Rather than always doing this manually, you can set up automatic scaling with SiteGround. It will adjust your CPU and RAM to meet the needs of unexpected traffic surges, but you still have control of all the parameters.
There are four plans for SiteGround Cloud hosting. As you can see from the image above, the plans range from $80 to $240 per month. So there’s definitely plenty of options to choose from.
I’d say that the business plan will likely be a suitable choice for most of you who are using a cloud hosting service for the first time.
Dedicated servers
For those of you who don’t want to use cloud hosting or shared hosting, SiteGround offers dedicated server options as well.
This is perfect if you don’t want any restrictions in terms of the software you use on your website. You’ll also be able to make changes directly to your server if you go with this route.
All servers are managed by the experts at SiteGround. They also offer software designed to boost the performance of your server and provide added functionality.
You can also choose the location of your data center.
United States
Europe
Asia-Pacific
There are three dedicated server plans offered by SiteGround:
Entry Server
Power Server
Super Power Server
These plans start at $269 per month, $349 per month, and $729 per month, respectively.
Conclusion
I’ll get straight to the point—I would definitely recommend SiteGround for web hosting.
This platform offers a wide range of hosting types and plans to accommodate the needs of nearly any website, large or small. SiteGround stacks up well compared to its competitors in terms of features and performance.